How to Remove 127.0.0.1 Proxy Server Setting Virus Windows 10 (Easy Steps to Follow)
You have to delete ProxySettingsPerUser from the Registry Editor app to remove the 127.0.0.1 Proxy Server Setting Virus.
The virus 127.0.0.1 Proxy Server Setting keeps switching on, resulting in a No Internet Connection problem. To delete this virus, you have to go to Registry Editor > Computer > HKEY_LOCAL_MACHINE > SOFTWARE > Policies > MIcrosoft > Windows > CurrentVersion > Internet Settings. Then delete the ProxySettingsPerUser value and reset internet settings.
Can a Proxy Be a Virus
Between a company’s network and the internet, proxy servers serve as a bridge. When a host computer linked to a proxy server becomes infected with a proxy virus, the virus has the ability to seize control of the proxy server and function as a proxy bot. These bots can be used by attackers to launch covert attacks against networks.
About Proxy Virus
Proxy Virus also referred to as MITM Proxy Virus is a recent trend in browser hijacking software. Cybercriminals frequently utilize various adware-type programs to spread this infection. These typically invade computers without the users’ consent.
How to Remove 127.0.0.1 Proxy Server Setting Virus Windows 10
The 127.0.0.1 Proxy Server Setting virus shuts down the internet connection by turning on the proxy server again and again if you still turning it off manually.
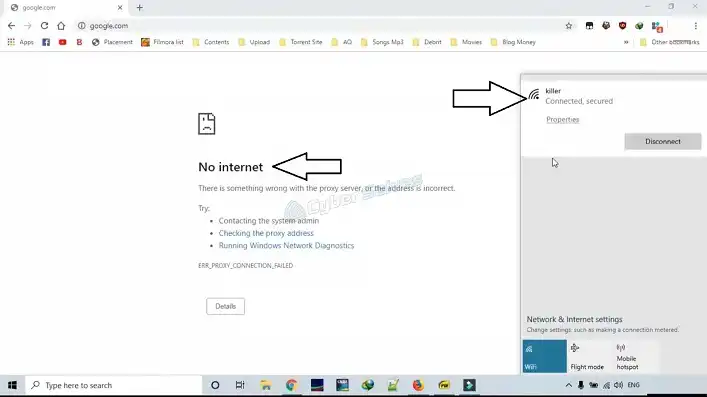
Now let’s find out the problem. Go to Network and Internet > Proxy and scroll down a little bit. You will find a custom proxy named 127.0.0.1 and it is the main culprit behind the No Internet Connection problem.
Now the problem is, if you turn off this proxy, it turns on itself again and causes No Internet Connection problem. Now follow the given steps to solve this problem:
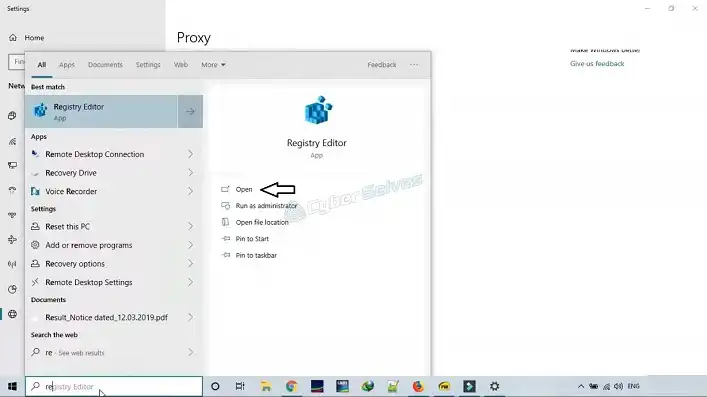
- Open the Registry App.
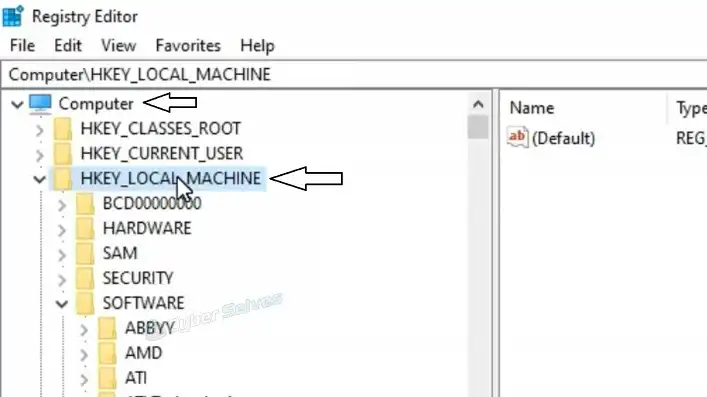
- Now go to Computer and click on HKEY_LOCAL_MACHINE.
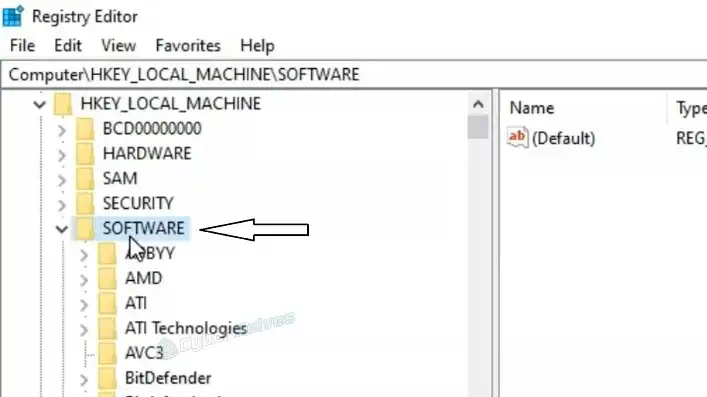
- Go to SOFTWARE.
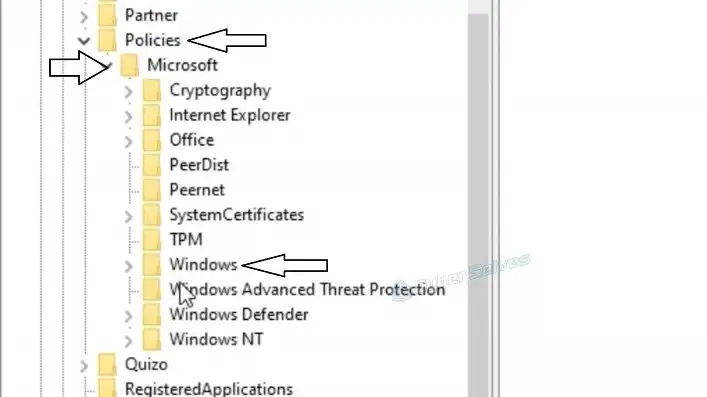
- Then click on Policies > Microsoft > Windows.
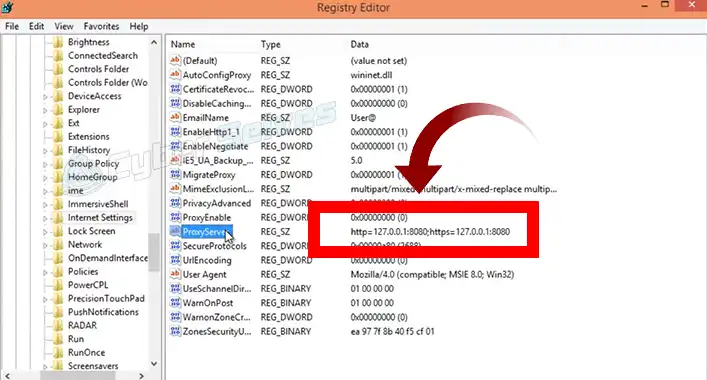
- Now click on CurrentVersion and finally click on Internet Settings.
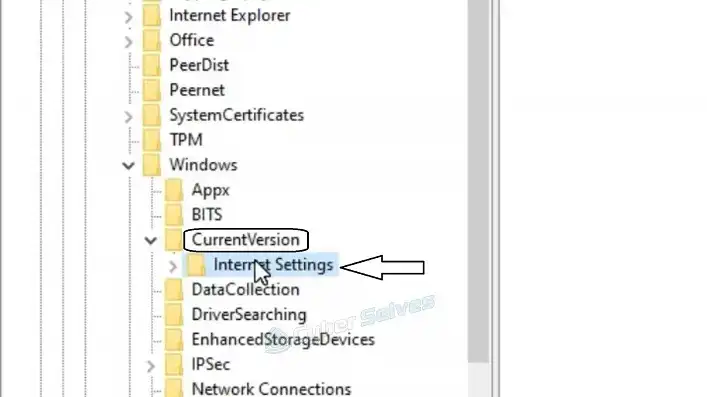
- You will find ProxySettingsPerUser on the right side.
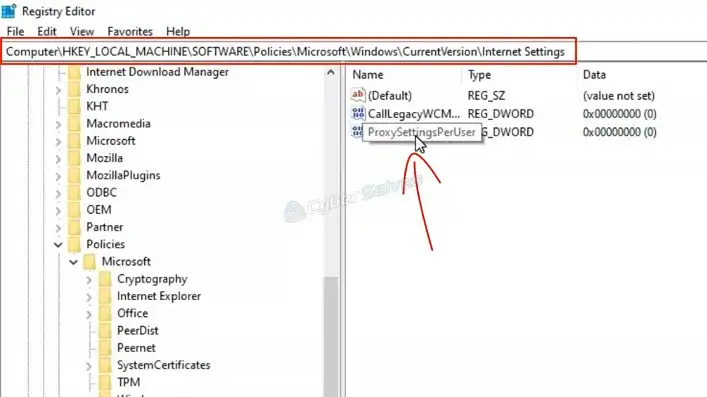
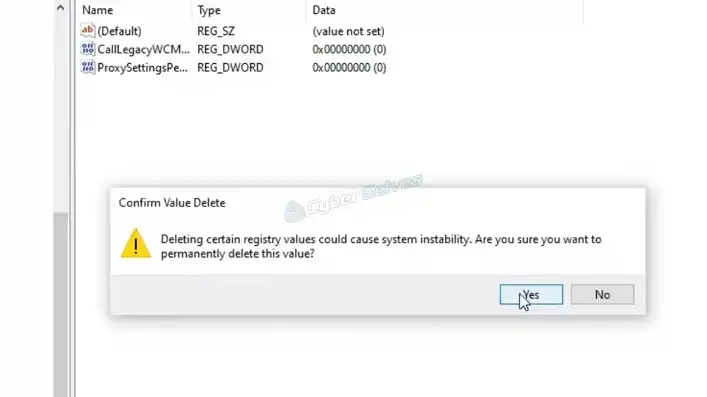
- Just right-click on it and delete it.
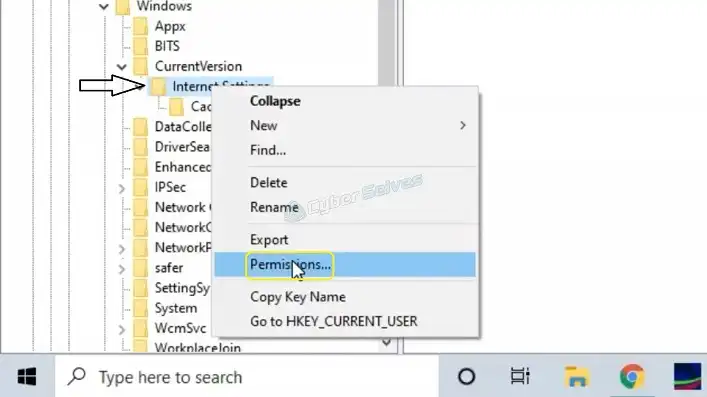
- Right-click on Internet Connection, then click Permissions on the right side of the screen.
- Now, under the group or user name, allow full control for each and every one.

- Click on apply and ok.
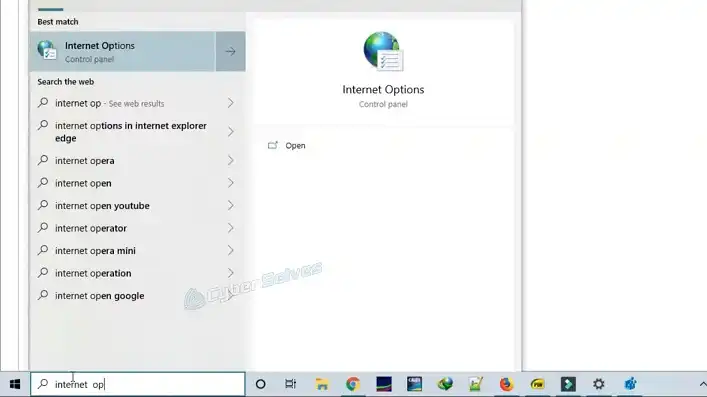
- Now close the Registry App and open Internet Options.
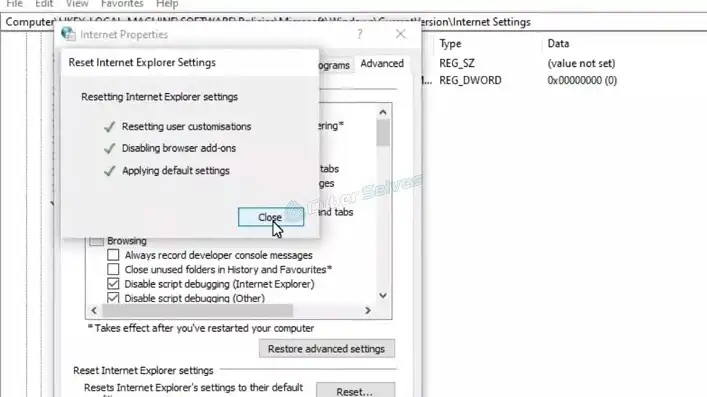
- Go to Advanced. Click on Restore advanced settings then click on Reset.

- Now you will see it will reset and apply default settings. Click on close.
- Check your internet connection, and you will be ready to go.
How Do I Remove the Script Address 127.0 0.1 86
Follow the steps below to remove the script address 127.0.0.1 86:
- Open regedit.exe as administrator
- Go to Explorer then HKEY_LOCAL_MACHINE\SOFTWARE\Policies\Microsoft\Windows\CurrentVersion\Internet Settings
- Change ProxySettingsPerUser value to 1
- Exit the regedit.exe program.
- Now changing your proxy server can work.
How Do I Permanently Remove Proxy Settings
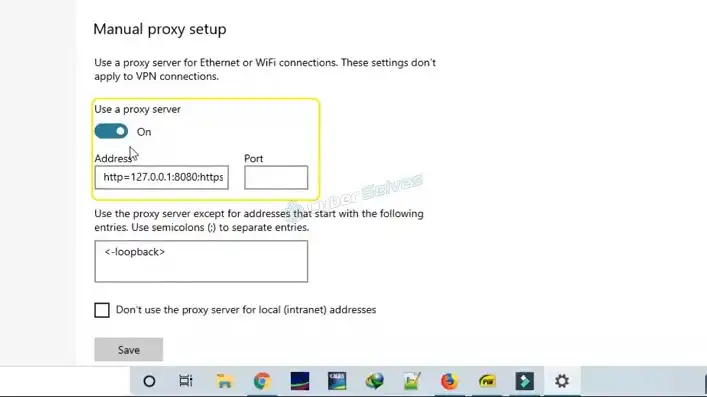
Click “Open your computer’s proxy settings” under System. This will launch the Proxy Settings window on Windows 10. Turn off the automatic proxy setup by automatically detecting parameters and using the setup script. Turn off the manual proxy setup by clicking Save after using a proxy server.
How Do I Disable Proxy Server in Windows 10
Follow these five steps to disable the proxy server in Windows 10:
- Open Start.
- Now search for gpedit.msc and click OK. It will open the Local Group Policy Editor.
- Follow the following path: User Configuration > Administrative Templates > Windows Components > Internet Explorer
- Now, On the right side, double-click the Prevent changing proxy settings policy.
- Select “Enabled.”
- Click “Apply” and “Ok.”.
Once you’ve completed the instructions, the proxy options available in the Settings app and through Internet Options will be hidden from users. Users cannot modify a custom proxy configuration that has already been set up; it will remain in place.
How Do I Permanently Disable Proxy Server
If RezStream Cloud is running slowly for you, this may help. If your proxy settings are changed by anti-virus software or other software that is set to “automatically detect,” problems may result.
- Go to Start Menu.
- Now search Settings and open it.
- Open Network and Internet.
- Click on Proxy from the left panel.
- Turn off the automatically detect settings option from the automatic proxy setup.
- Disable the “Use a proxy server option” from the manual proxy setup.
- Now close settings and restart your PC.
Frequently Asked Questions And Answers
How Do I Know if I Am Using a Proxy?
In the Internet Options box, select the “Connections” tab. Select “LAN Settings” from the menu. If the option to “Use a proxy server for your LAN” has a checkmark next to it, then your PC uses a proxy server to access the Internet. Your machine does not use a proxy server if the box has an empty check mark.
What Happens if You Turn Off Proxy?
Your computer would just connect straight to the internet in order to visit the website and display it for you if there wasn’t a web proxy. When using a proxy, your computer will connect to the proxy, a different server that stands between your device and the internet.
Conclusion
If you still turn off the proxy server manually, the 127.0.0.1 Proxy Server Setting virus disables the internet connection by turning it on repeatedly. For the 127.0.0.1 Proxy Server Setting Virus to be eliminated, ProxySettingsPerUser must be deleted from the Registry Editor application.


![Can You Get a Virus from Opening a Snapchat? [Explained]](https://cyberselves.org/wp-content/uploads/2023/03/Can-You-Get-a-Virus-from-Opening-a-Snapchat.webp)
