[Fix] Failed To Detect The Bitlocker State For Eds Log Drive (100% Working)
After Cumulative Update 7 or CU7, there has been a common error encountered by many users that shows the message ‘Failed To Detect The Bitlocker State For Eds Log Drive’. Although this error message can easily be ignored, such pop is always annoying.
To solve the problem, you can just go to Windows Exchange Server Diagnostic Root Directory and make some changes in the config file. This will help you to get rid of the error message pop-up. Although this might prevent other important error messages from popping up.
To know more about this in detail, follow this article.

What Is the Bitlocker State in Windows
Bitlocker, also known as Bitlocker Drive Encryption, is a Microsoft encryption and security service that offers a lot of conveniences when it comes to the security of your PC. With the new version of Bitlocker, you can encrypt everything you have in the drive where the windows are installed and prevent anyone unauthorized to access your data.
In Windows 10 of version 1511, Microsoft updated Bitlocker with a new encryption algorithm. And this new standard encryption standard algorithm with 128-bit or 256-bit keys offers new OS drives, removable data drives, and new group policy settings.
How To Fix the ‘Failed To Detect The Bitlocker State For Eds Log Drive’ Error
However, when you have a cumulative update in your Microsoft Exchange server, you might face significant errors. Although in most cases, these errors can easily be ignored and get fixed up with some other patches. But while you are at it, some steps can solve this issue for you.

To explain it in detail, the Windows Event Log happens to fill up with messages related to Bitlocker on the Exchange 2019 servers after installing Cumulative Update 9 (CU9) for Exchange Server 2019. And this has been going on since the exchange servers 2013 for Cumulative Update 7 (CU7).
So the Exchange will look for the Driver Encryption Status and if the feature is not installed, it will keep showing failure. And these can easily be fixed by some minor changes in the file. To fix it up, follow the simple steps mentioned below:
Step 1: Disable the Bitlocker Check
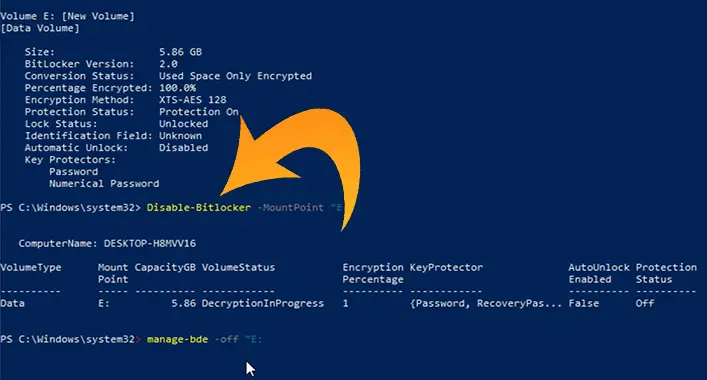
The Bitlocker check is usually turned on or enabled by default. So before making any changes, you will have to disable the BitLocker check on that particular drive where the diagnostic logs are stored or the diagnostic root directory exists.
Step 2: Open the Microsoft Exchange Diagnostic Service Config File
Follow the file directory mentioned below:
C:\Program Files\Microsoft\Exchange Server\V15\bin\Microsoft.Exchange.Diagnostics.Service.exe.config
Now open this file on the notepad and run it as administrator.
Step 3: Change the Microsoft Exchange Diagnostic Service Config File
At this point, you will have to make some changes to the config file. To do so, change the variable “DriveLockCheckEnabled” value=”True” to “DriveLockCheckEnabled” value=”False” and save the file.
<add key=”DriveLockCheckEnabled” value=”false” />
Step 4: Restart the Microsoft Exchange Diagnostics Service
Once the changes are made properly, restart the Microsoft Exchange Diagnostics service and the error message should not pop up anymore.
Conclusion
Making such a minor change on the config file will not ruin anything for you. But the problem is, the problem will not go away totally. Although you will no longer see the ‘Failed To Detect The Bitlocker State For Eds Log Drive’ error. Still, there will be lots of error messages related to this topic and maybe other important topics as well. But in most cases, they will be hidden.
![[Fixed] An Error Occurred While Chrome was Searching for Harmful Software (100% Working)](https://cyberselves.org/wp-content/uploads/2022/03/an-error-occurred-while-chrome-was-searching-for-harmful-software.jpg)

![[Fix] Malware Blocking Internet Access (100% Working)](https://cyberselves.org/wp-content/uploads/2022/05/How-to-Fix-Malware-Blocking-Internet-Access.jpg)

![[Fix] Virus won’t Let Me Download Antivirus (100% Working)](https://cyberselves.org/wp-content/uploads/2022/10/Virus-Wont-Let-Me-Download-Antivirus.jpg)
![[Fix] Avast Firewall Blocking Network Share (100% Working)](https://cyberselves.org/wp-content/uploads/2022/06/Avast-Firewall-Blocking-Network-Share.jpg)